
19 DIY Christmas Centerpiece Ideas for a Festive Holiday Table
The dining table is where Christmas happens. It holds the roast, the laughter, the stories told twice, and the quiet moment when everyone finally sits down together. A beautiful centerpiece sets the tone for all of it, and the best part is that you do not need a florist or a big budget to make one. These 19 DIY Christmas centerpiece ideas use candles, fresh greenery, fruit, and things you probably already own to turn an ordinary table into a festive one.
Every idea below focuses on the centerpiece itself, not the whole table setting. You will find candlelit classics, edible displays, rustic woodland looks, and a few glamorous options, plus practical tips for building each one at home. Pick the style that matches your home, gather your supplies, and give your Christmas dinner the finishing touch it deserves.
1. Classic Evergreen and Candle Christmas Centerpiece Ideas
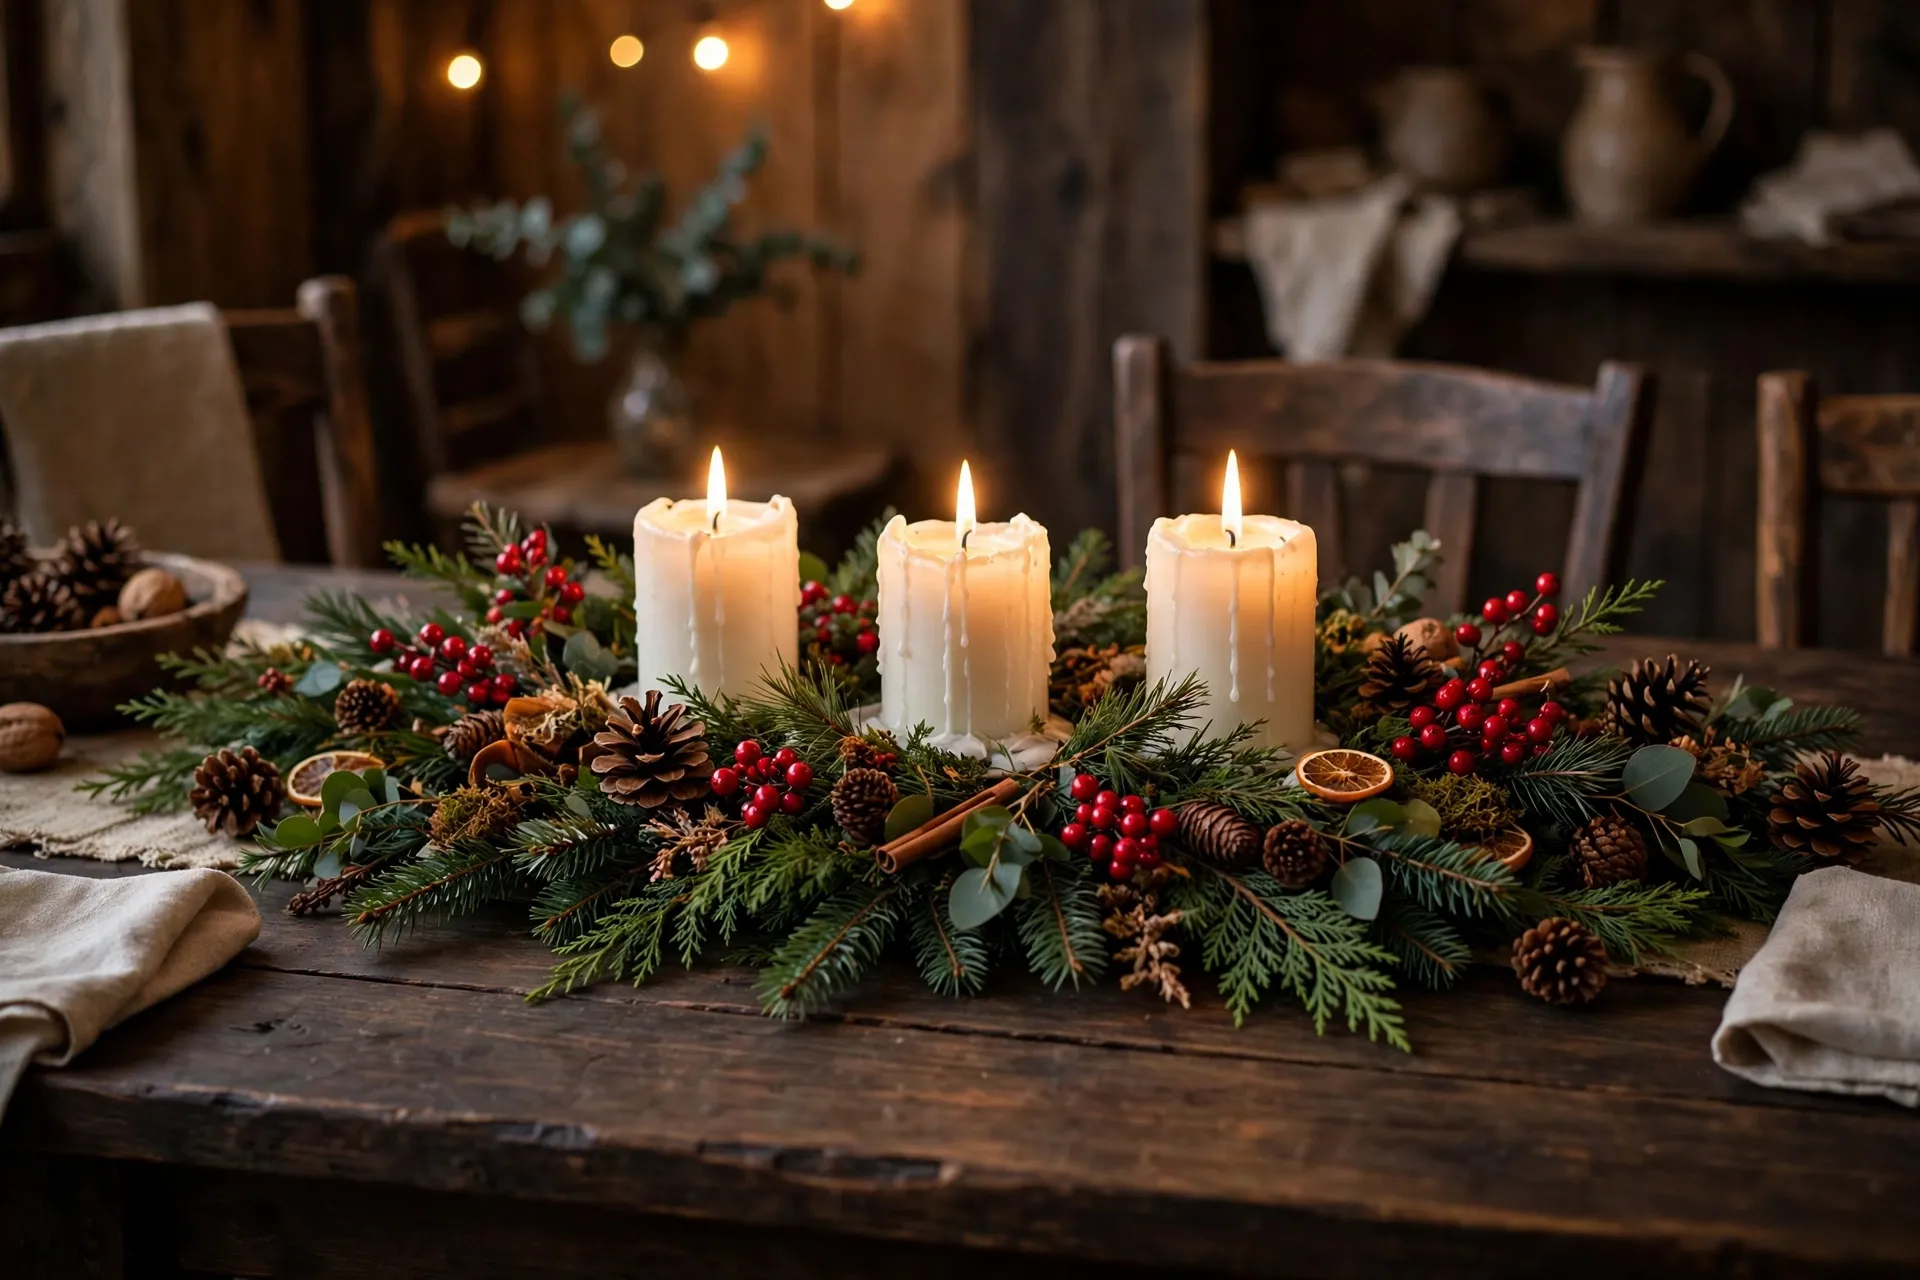
Nothing says Christmas quite like fresh evergreen and candlelight. Start with a low, wide tray or a simple wooden board, then lay pine, cedar, or fir branches down the middle in a loose, overlapping line. Tuck three white pillar candles of different heights into the greenery, add a few pinecones and red berries, and you have a centerpiece that looks like it came from a magazine. The mix of deep green, warm light, and natural texture works with almost any tablecloth or dinnerware.
Build this one the morning of your dinner so the greenery stays fresh and fragrant. Mist the branches lightly with water and keep the candles in sturdy holders so melted wax never touches the table. If you want more inspiration for candlelit tables, HGTV’s Christmas candle decorating ideas show how designers layer pillars with greenery for a warm glow. Trim any branches that hang over the table edge so plates and glasses have room.
- Use three pillar candles in different heights for a natural, layered look.
- Mix two types of greenery, such as pine and cedar, for richer texture.
- Place a heatproof tray underneath to catch wax and protect the wood.
- Swap real candles for flameless pillars if children will sit at the table.
2. Mason Jar Candles with Cranberries and Greenery
Mason jars are the easiest starting point for a homemade centerpiece, and they look far more expensive than they are. Fill each jar halfway with water, drop in a handful of fresh cranberries and a small sprig of evergreen, then float a tea light on top. Line three or five jars down the center of the table, and the cranberries glow ruby red while the candlelight flickers through the glass. It takes about ten minutes and costs almost nothing.
Use jars in different heights to keep the arrangement from looking flat, and tie a bit of twine or thin ribbon around each neck for a finished touch. Fresh cranberries last for days in water, so you can build this one the night before. Set the jars on a narrow wooden board or a folded linen runner to catch drips and to pull the row together into one clear centerpiece.
- Choose wide-mouth jars so the tea lights sit flat and stay centered.
- Add a few drops of cranberry juice to deepen the red color of the water.
- Keep the jars low so guests can see each other across the table.

3. Wooden Tray Centerpiece with Pinecones and Pillars
A wooden tray turns a loose group of decorations into one intentional centerpiece, and it makes cleanup wonderfully easy. Pick a tray that spans about two-thirds of your table length, then arrange white pillar candles, pinecones, cinnamon sticks, and evergreen sprigs inside it. The tray keeps everything contained, protects the table from wax, and lets you lift the whole display away when it is time to serve dessert.
Start with the tallest candles in the middle and work outward with shorter pieces so the arrangement has a gentle peak. Fill gaps with small pinecones and sprigs of greenery, and add a few dried orange slices for color. A tray with handles looks best, since you can carry it to a sideboard between courses without disturbing a single pinecone.
- Measure your table first and choose a tray about two-thirds as long.
- Use battery-operated candles if the tray will sit near a tablecloth edge.
- Spray pinecones with a light coat of gold paint for a dressier finish.

4. Fresh Eucalyptus Runner with White Taper Candles
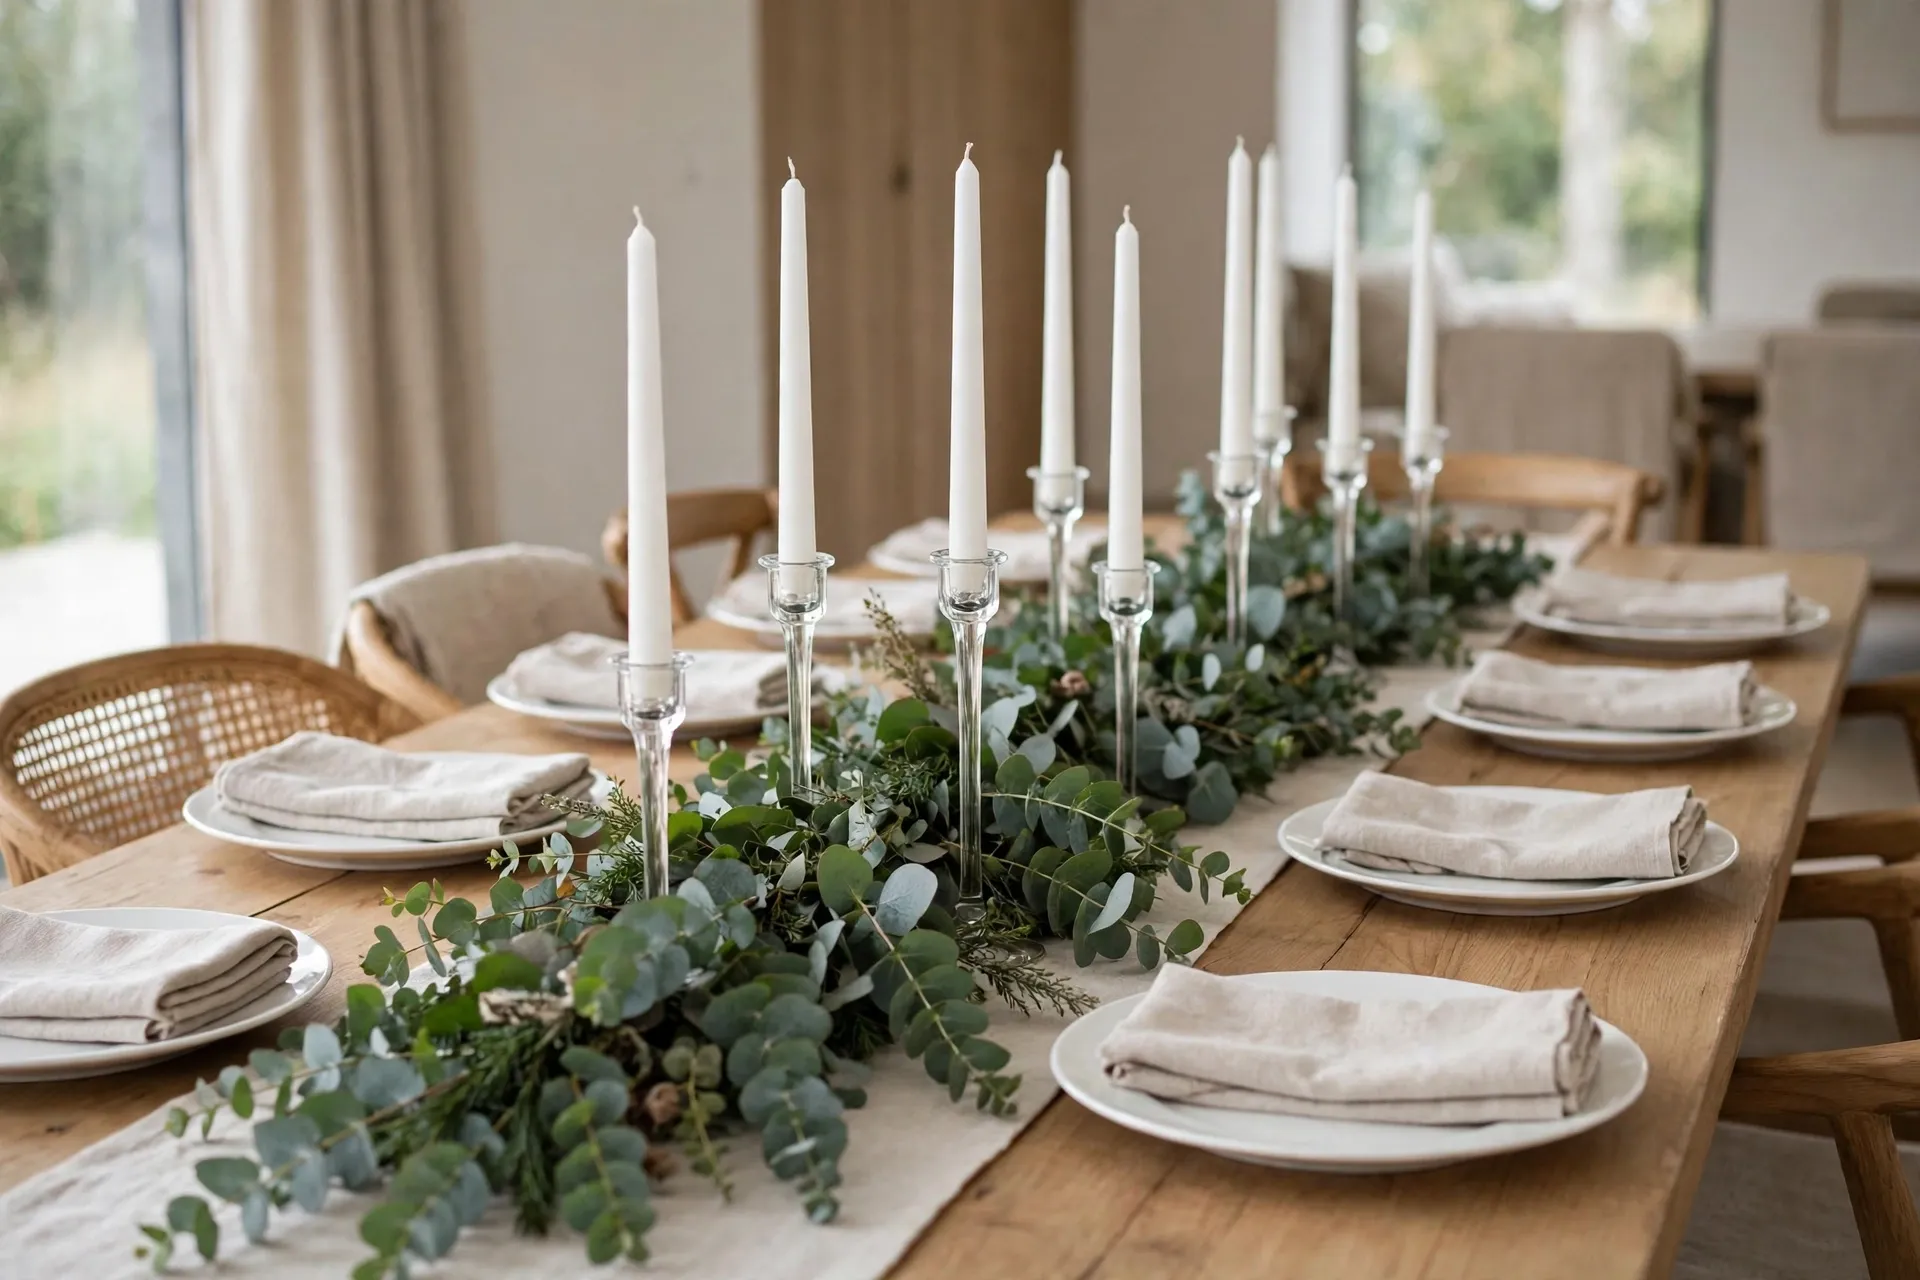
If you love a calm, elegant table, skip the heavy red and green and build a runner from fresh eucalyptus instead. Lay long stems of seeded eucalyptus down the center of the table, overlapping them so the line looks full, then place tall white taper candles in simple glass holders along the runner. The silvery green leaves smell wonderful, and the pale candles keep the whole display light and airy.
This style works beautifully on a white or light wood table, and it pairs well with white plates and linen napkins. Buy the eucalyptus two days early and store it in a cool spot, since it dries gracefully rather than wilting. Add a few white ornaments or small pinecones if the runner looks sparse, but resist the urge to overload it because the simplicity is the point.
- Use seeded eucalyptus for texture and silver dollar eucalyptus for soft round leaves.
- Keep taper candles in stable holders so they never lean toward the greenery.
- Trim the runner ends so they stop a few inches short of the table edge.
5. Floating Candles in a Cranberry and Orange Bowl
A wide glass bowl filled with water, cranberries, and orange slices makes a centerpiece that guests will stare at all evening. The floating candles cast a soft glow, the cranberries sink and shine like jewels, and the orange slices add a warm citrus color that feels fresh rather than traditional. It is one of the prettiest ideas here, and it takes less than fifteen minutes to assemble.
Choose a bowl that is wide and shallow rather than tall, so the candlelight spreads across the table instead of hiding inside deep glass. Slice the oranges thin so they float nicely, and add the cranberries first so they settle at the bottom. Build it a few hours before dinner, and top up the water if any evaporates under the candle heat.
- Use three floating candles in different sizes for a balanced glow.
- Add a few evergreen sprigs around the base of the bowl for framing.
- Place the bowl on a cork mat to protect the table from condensation.

6. Mini Christmas Tree in a Galvanized Bucket
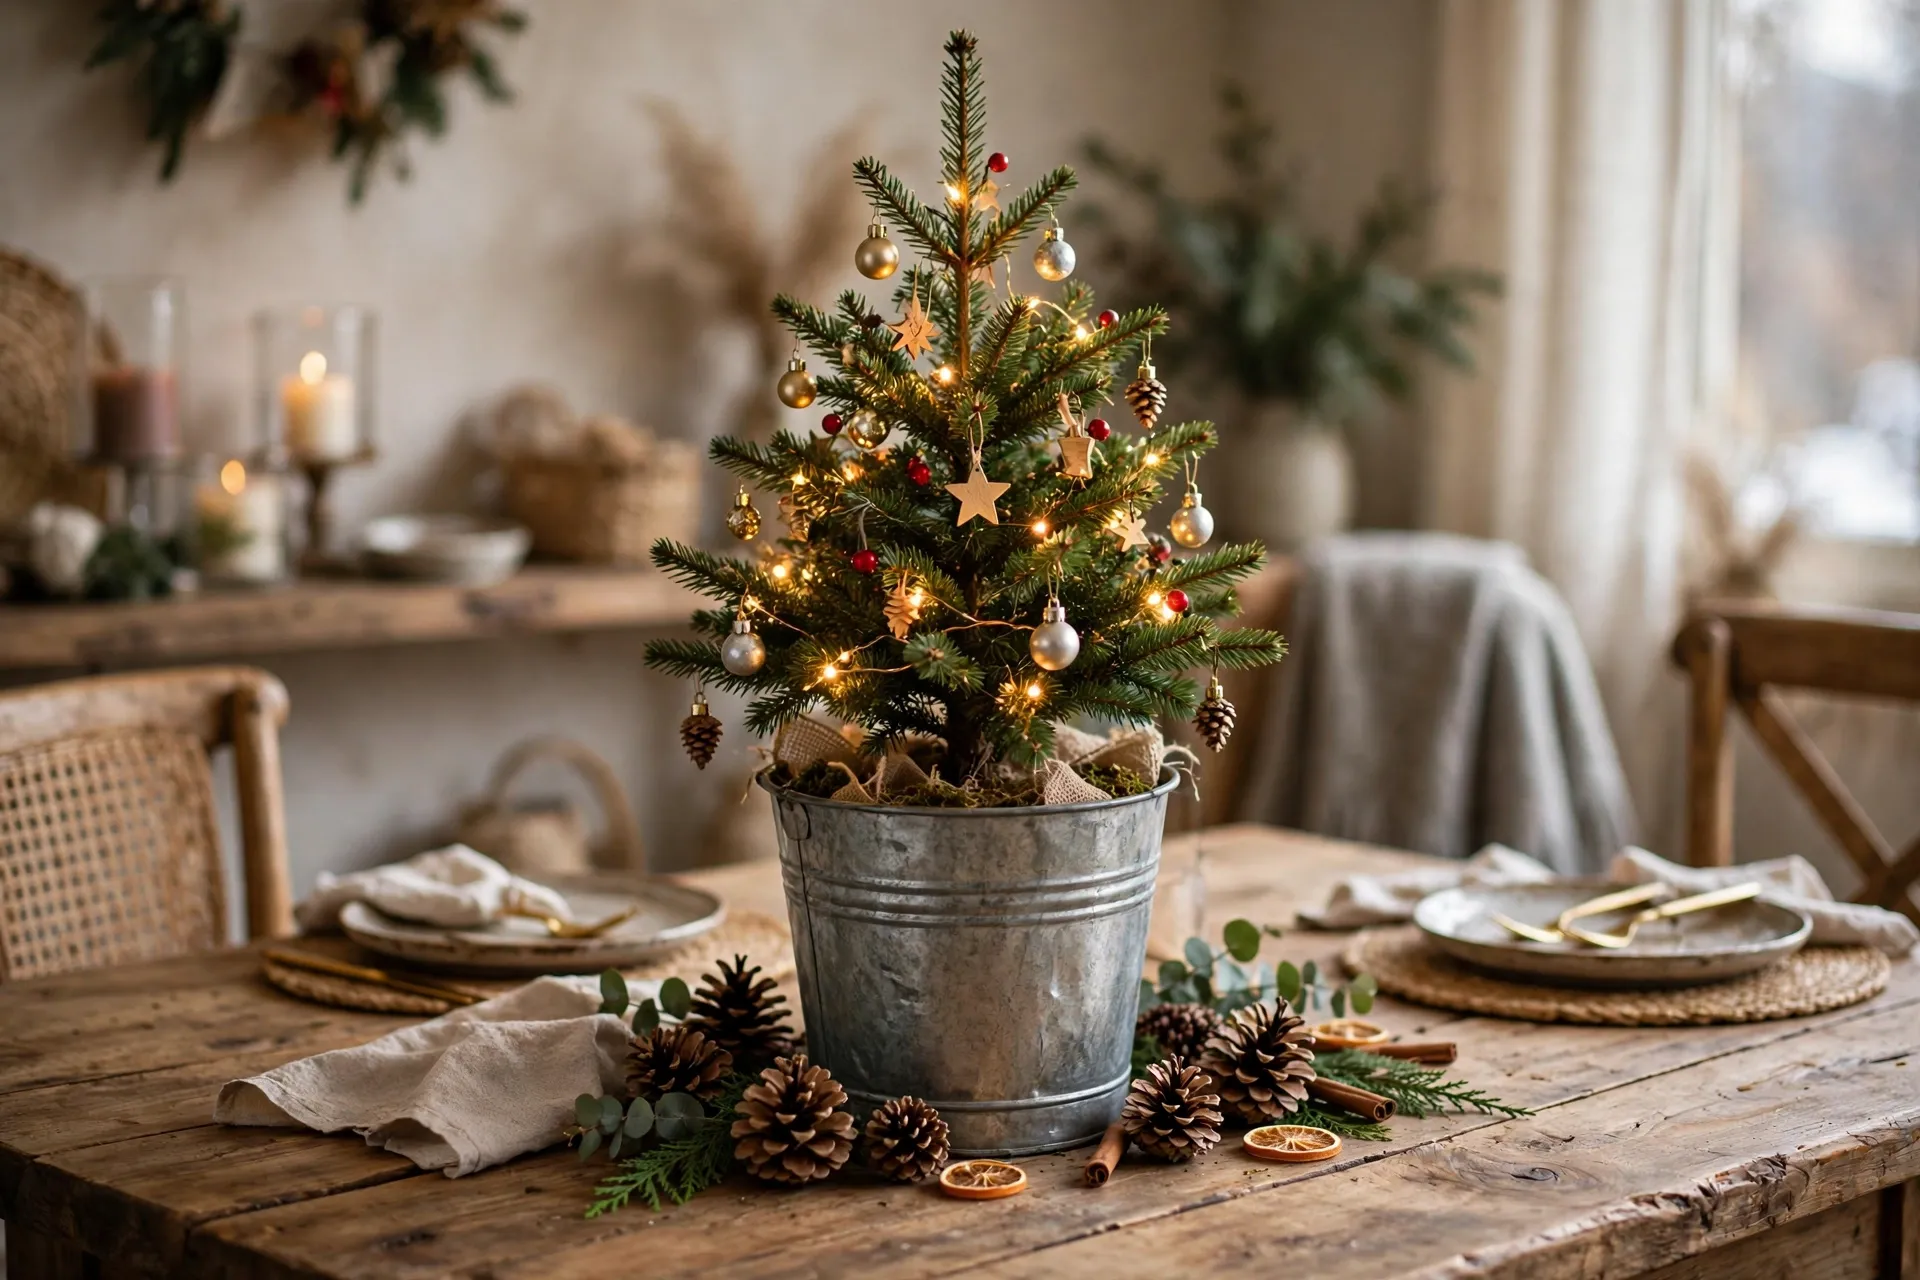
A small Christmas tree makes a delightful centerpiece, especially when it sits in a galvanized metal bucket. Pick a tabletop tree about eighteen inches tall, decorate it with tiny ornaments and a short string of warm fairy lights, and set the bucket on a folded plaid cloth or a round wood slice. It brings the magic of the big tree right to the dinner table, and children love it most of all.
Keep the decorations small so the tree does not look top-heavy, and use battery-operated lights with a timer so the tree glows through dinner without a cord trailing across the table. If you already dressed your main tree, carry the theme down to the tabletop version with the same ornament colors. Our DIY Christmas tree skirt ideas can help you match the big tree to the table for a pulled-together look.
- Weigh the bucket down with a few stones so the tree never tips.
- Use shatterproof mini ornaments if little hands will reach for them.
- Surround the base with pinecones to hide the bucket rim.
7. Rustic Log Slice Candle Holders
Log slices bring a woodland cabin feeling to the Christmas table, and they cost almost nothing if you cut them yourself. Place three log slices of different sizes down the center of the table, set a tea light or a short pillar candle on each one, and scatter pinecones, evergreen sprigs, and red berries around the bases. The raw wood edges and soft candlelight make the whole table feel warm and handmade.
Sand the top of each slice lightly so candles sit flat, and seal the bark edges with a clear matte spray if you want to keep needles and bark off the tablecloth. This centerpiece pairs beautifully with plaid napkins and stoneware plates. For a taller display, stack two slices under the middle candle to create a gentle rise in the center.
- Cut slices about one inch thick so they sit stable and level.
- Use flameless tea lights if the slices will sit close to dry greenery.
- Mix birch slices with darker wood for contrast.

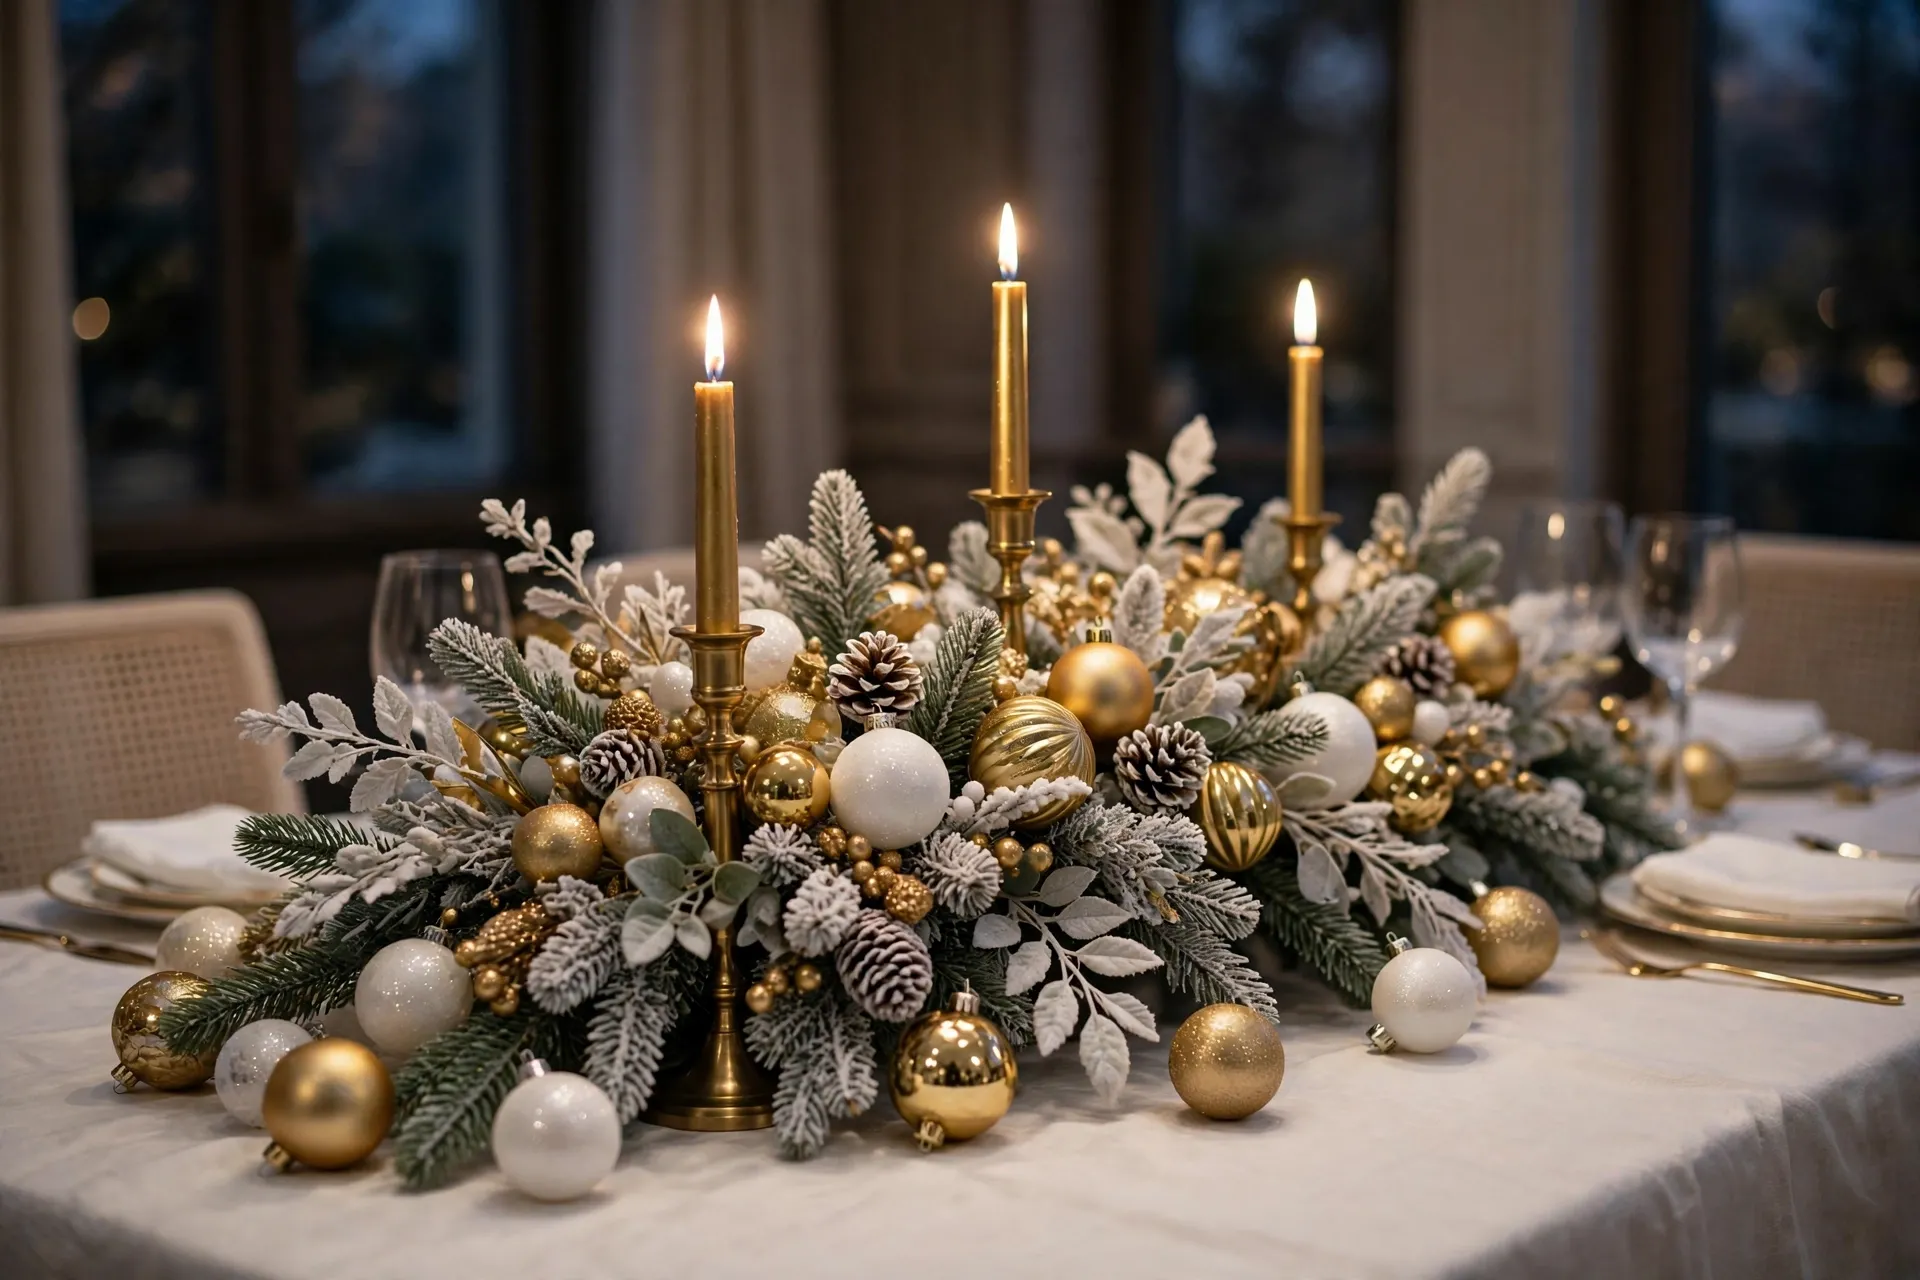
8. Gold and White Glam Centerpiece with Metallic Ornaments
For a table that sparkles, go gold and white. Arrange gold taper candles in brass candlesticks down the center, then fill the gaps with shiny gold and white ornaments, frosted greenery, and a few sprigs of silver eucalyptus. The metallic surfaces catch the candlelight and bounce it around the room, so the whole table glows even before the main lights dim.
Keep the palette strict to gold, white, and silver so the display reads as glamorous rather than busy. A white tablecloth and gold-rimmed plates complete the look, and a few white roses or white amaryllis stems add softness if the metallics feel too hard. This is the centerpiece to choose for a formal Christmas dinner or a New Year gathering that follows.
- Mix matte and shiny gold ornaments so the display has depth.
- Use unscented candles so the scent never competes with the food.
- Polish brass candlesticks the day before for maximum shine.
9. Edible Gingerbread House Centerpiece
A gingerbread house does double duty as a centerpiece and a dessert, and it always becomes the talking point of the table. Build a simple house from gingerbread panels or a kit, decorate it with white icing snow, gumdrops, and candy canes, then set it on a cake stand in the middle of the table. Surround the base with small gingerbread cookies and evergreen sprigs, and let guests admire it until dessert time.
Assemble the house at least a day ahead so the icing sets firm, and keep it away from steamy dishes so the decorations stay crisp. A cake stand lifts the house above the plates and makes it visible from every seat. If baking from scratch feels like too much, a store-bought kit decorated at home looks just as charming and saves hours.
- Use royal icing as glue because it dries hard and holds weight.
- Keep the house away from the stove and serving dishes to avoid humidity.
- Let children decorate the back side while you finish the front.

10. Red Berry and Pinecone Garland Centerpiece
A garland running down the center of the table is one of the simplest centerpieces you can make, and it looks generous and abundant. Lay a fresh or faux pine garland along the middle, weave in clusters of red berries and pinecones, then nestle white pillar candles into the greenery at even intervals. The long, low line suits a rectangular dining table perfectly, and it leaves plenty of room for serving dishes on either side.
Fluff the garland well before laying it down, pulling branches outward so it looks full rather than flat. If you use a fresh garland, mist it lightly and build it the day before so the needles settle. This Christmas look pairs beautifully with the harvest style of our Thanksgiving centerpiece ideas, so if you loved that autumn table, this is its festive winter cousin.
- Choose a garland at least two feet shorter than the table so place settings fit.
- Wire the berry clusters in place so they never slide during dinner.
- Use flameless pillars inside thick garland to avoid scorching dry needles.

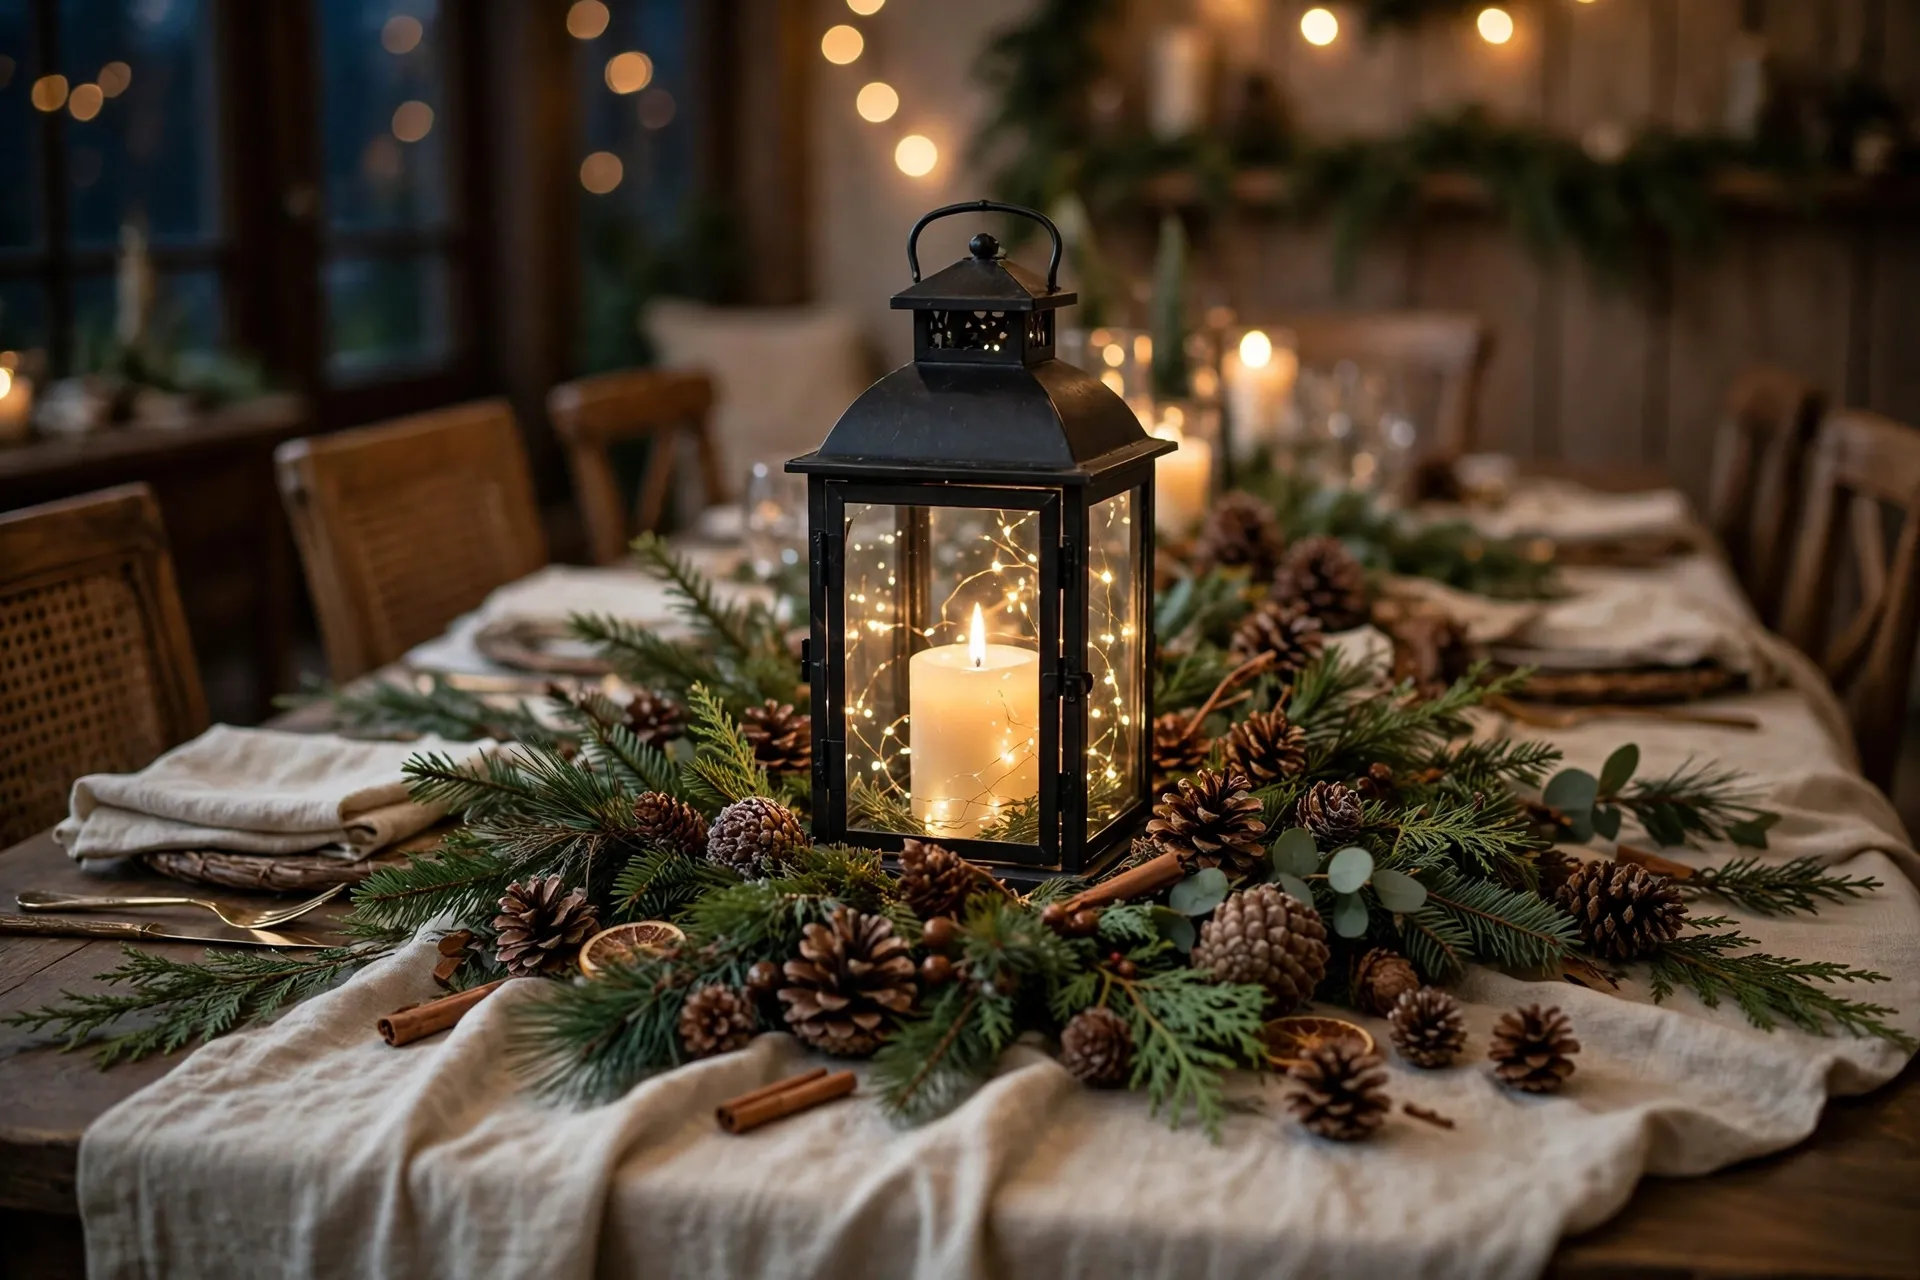
11. Lantern Centerpiece with Fairy Lights
A lantern centerpiece brings a soft, storybook glow to the Christmas table. Set a black or galvanized metal lantern in the middle of the table, place a pillar candle and a short string of warm fairy lights inside, then surround the base with evergreen branches, pinecones, and a few small ornaments. The lantern glass softens the light, and the whole display feels cozy and calm even in a large dining room.
Use one large lantern as a single focal point, or line up three small lanterns in a row for a longer table. Battery-operated fairy lights with a timer are the easiest choice, since no cords cross the table. The same lantern look works outside too, so if you want the glow to continue past the front door, our outdoor Christmas lights ideas show how to carry candlelight onto the porch.
- Choose a lantern with a door that opens easily for lighting the candle.
- Wrap fairy lights loosely so they never press against hot glass.
- Set the lantern on a wood slice to ground it visually on the table.
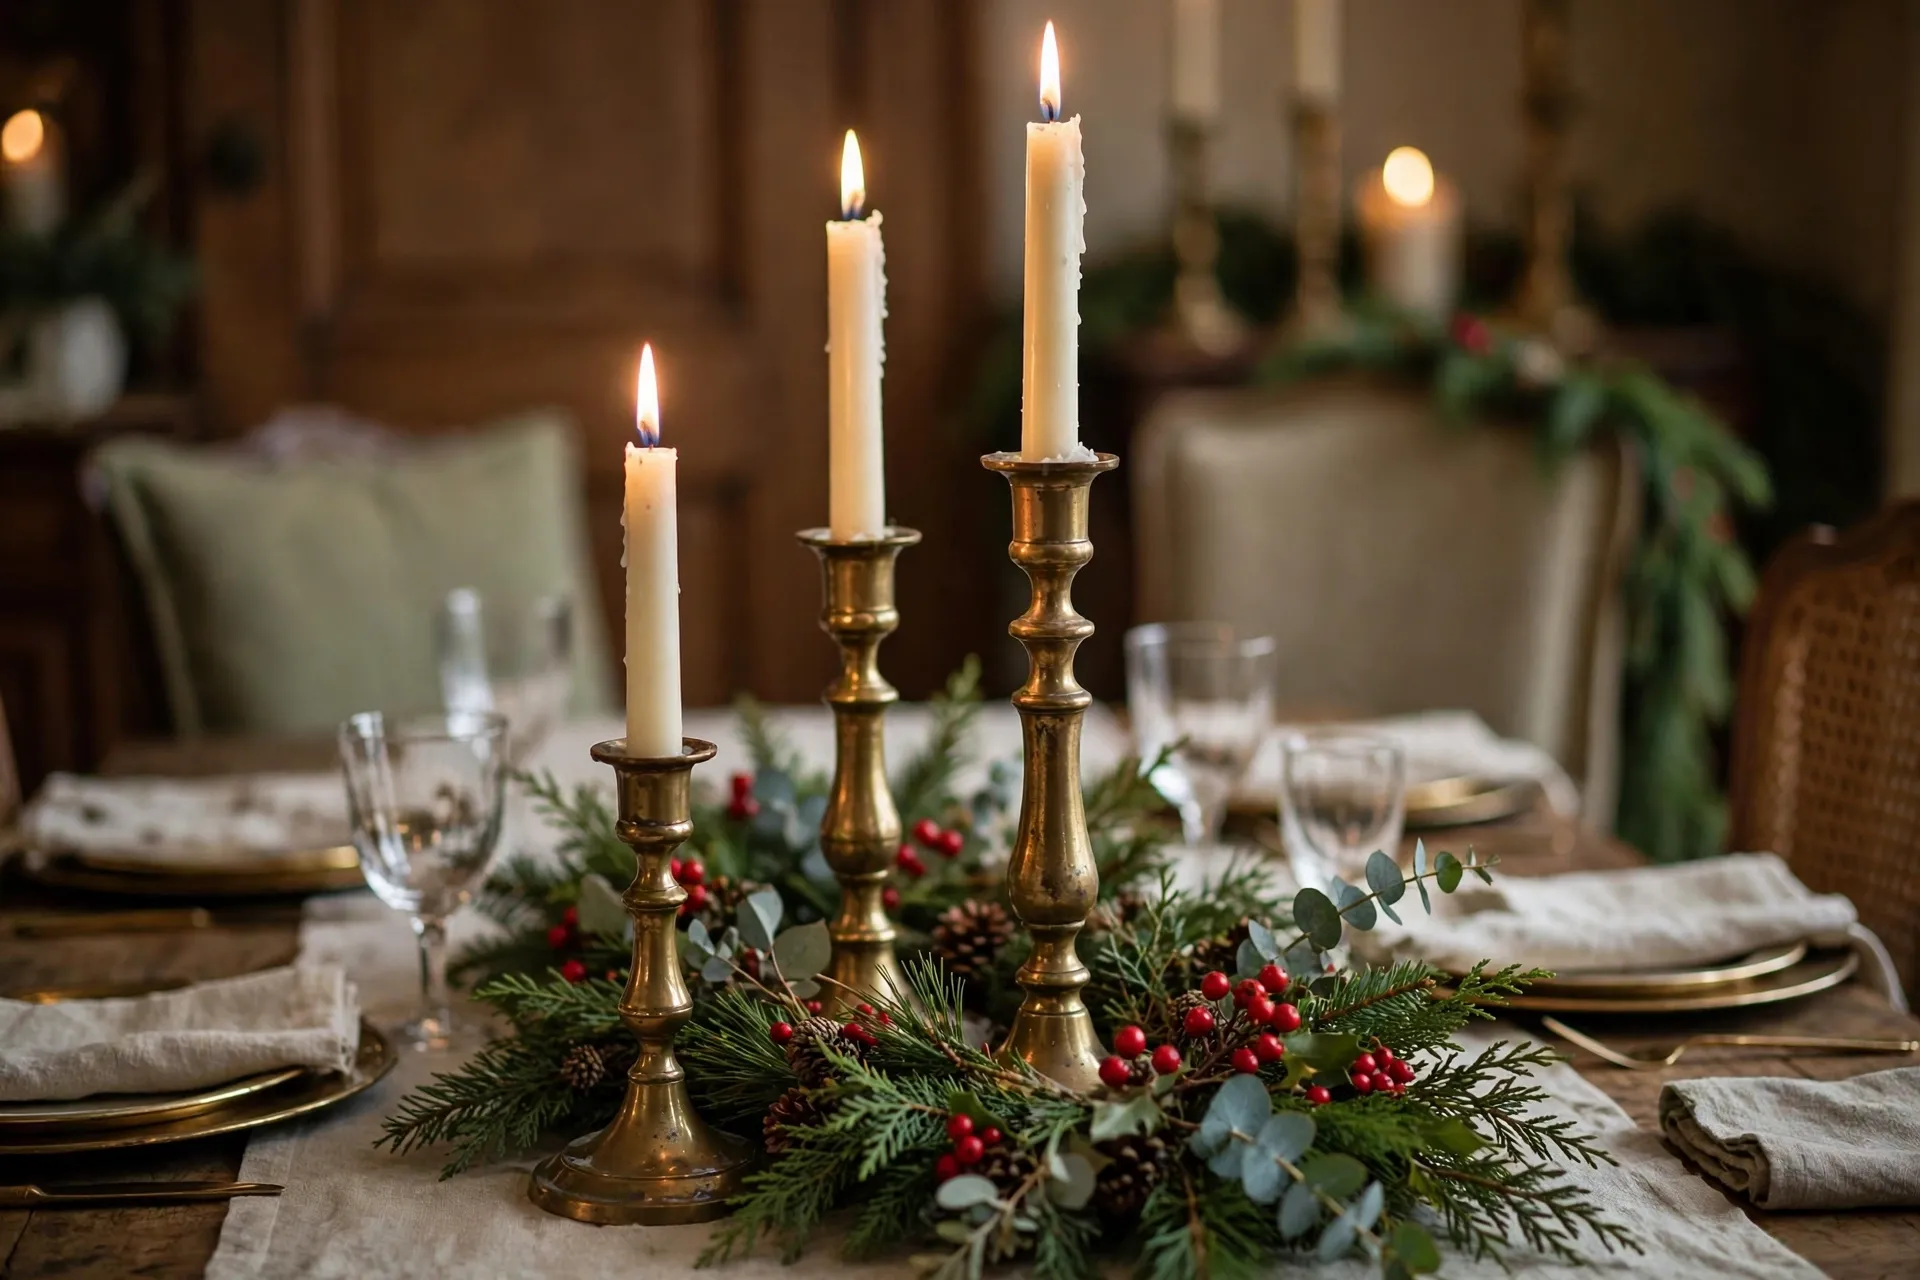
12. Vintage Brass Candlestick Centerpiece
Brass candlesticks bring instant elegance to a Christmas table, especially when they are vintage pieces with a little patina. Gather candlesticks in different heights, add tall ivory taper candles, and arrange them down the center with fresh greenery, red berries, and a few pinecones tucked between the bases. The warm metal glows against the green, and the varying heights create a lovely rhythm along the table.
Thrift stores and flea markets are the best places to find brass candlesticks cheaply, and mismatched pieces look better than a perfect set. Polish half of them and leave the rest with their natural patina for a collected-over-time feeling. If you want the table and the mantel to tell the same story, our Christmas mantel decor ideas use the same brass and greenery pairing above the fireplace.
- Anchor tall candlesticks with a small ball of museum putty underneath.
- Trim taper candles to staggered heights for a natural silhouette.
- Keep candles at least a foot from any hanging decoration above the table.
13. Snowy Flocked Greenery Centerpiece with White Pillars
A flocked centerpiece turns your dining table into a quiet winter scene. Use faux snow-dusted evergreen branches as the base, add white pillar candles in clear glass hurricanes, then scatter pinecones and silver ornaments through the branches. The white-on-white palette feels peaceful and a little magical, and it looks beautiful in daylight as well as candlelight.
Flocked greenery sheds a little, so lay it on a runner or a tray to keep the table clean. Mix in a few unscented white candles and one silver accent, such as a mercury glass votive, to keep the display from looking flat. This cool, snowy look is a lovely contrast to the warm reds elsewhere in the house, and it photographs beautifully for holiday cards.
- Shake flocked branches outdoors before bringing them to the table.
- Use glass hurricanes to protect the flame from drafts near windows.
- Add a few sprigs of fresh cedar for scent, since flocked branches have none.

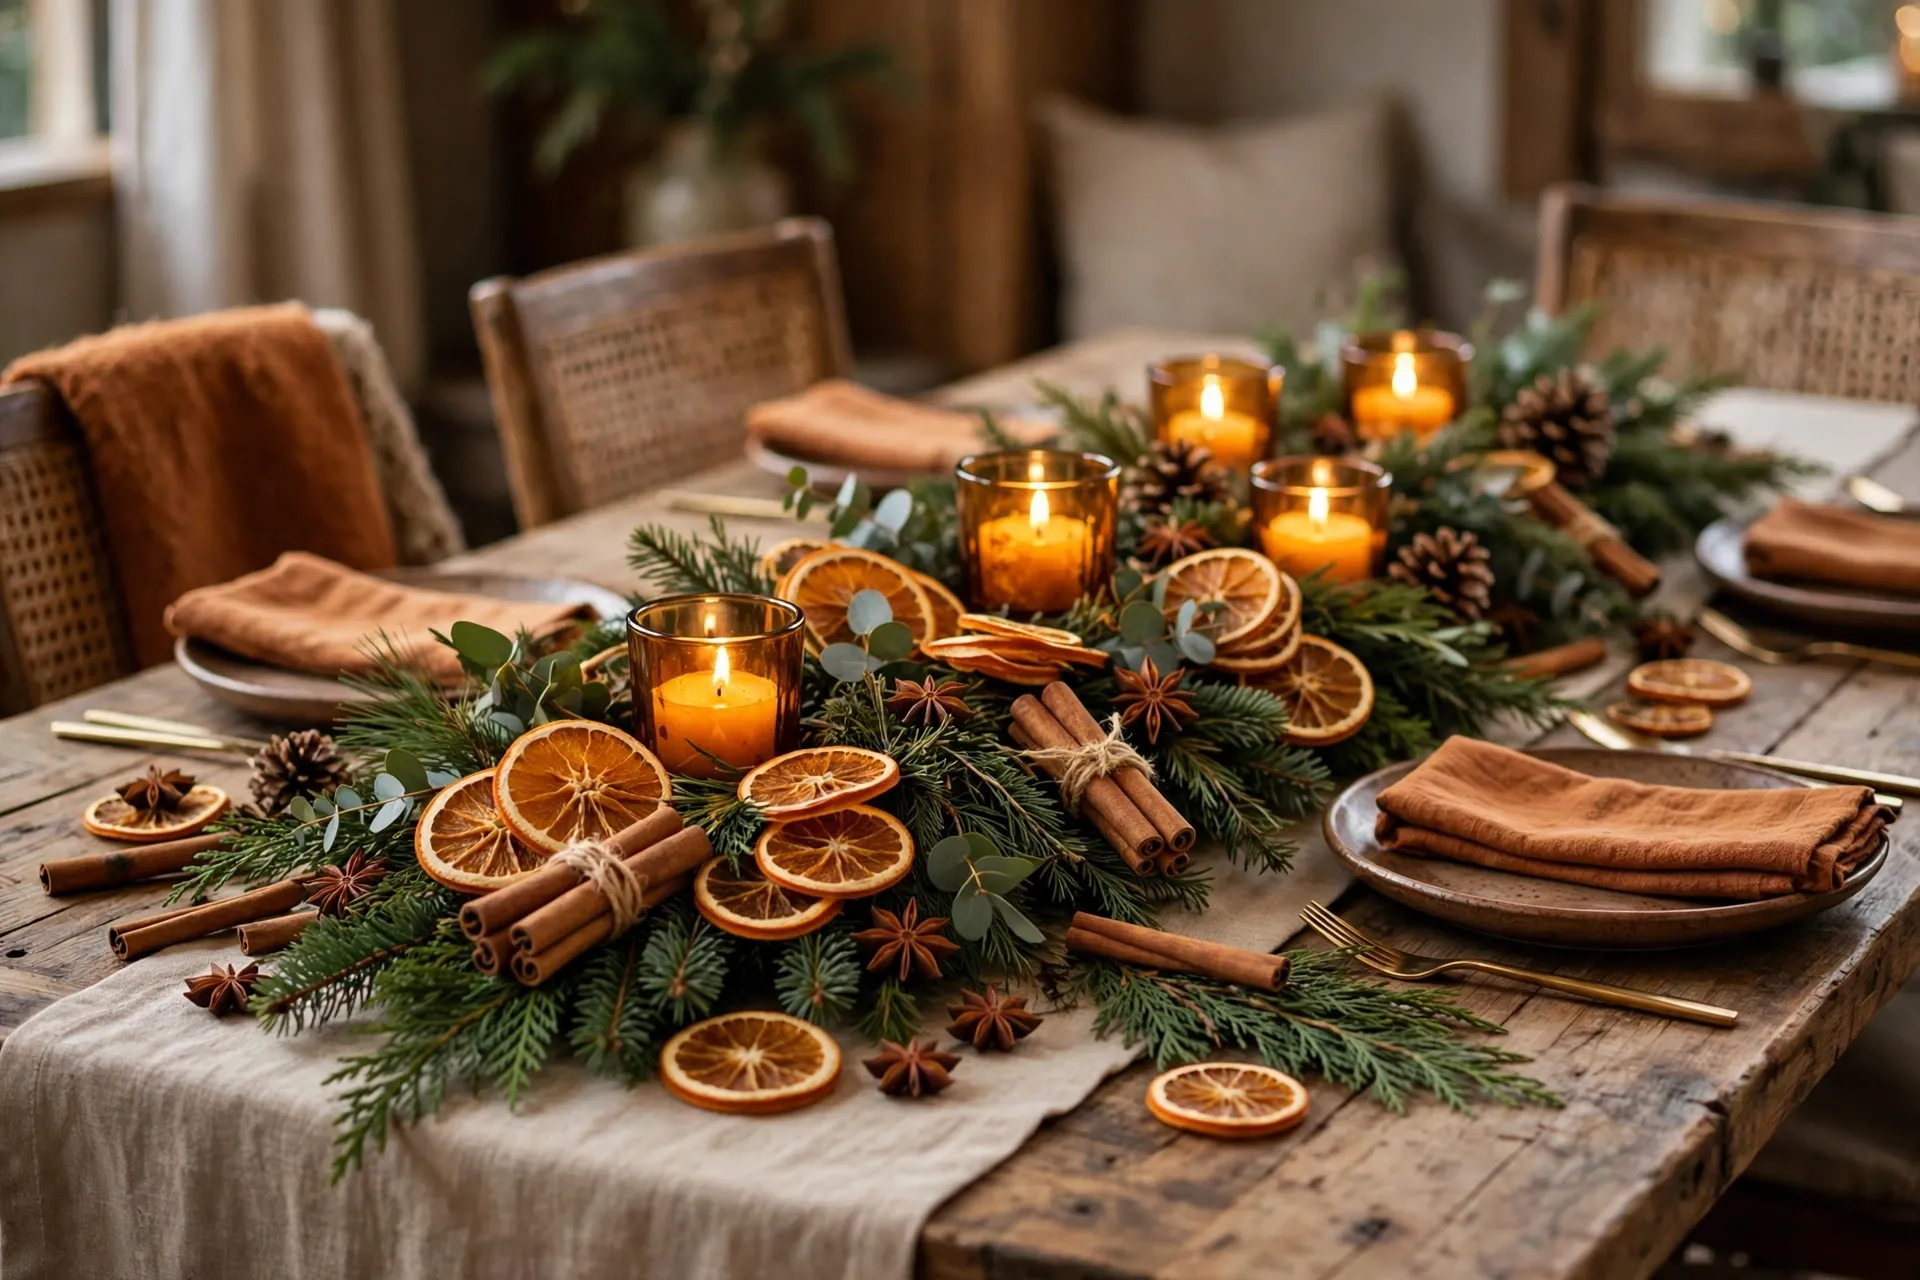
14. Citrus and Cinnamon Stick Centerpiece
Dried orange slices, cinnamon sticks, and star anise make a centerpiece that smells as good as it looks. Arrange the dried citrus and spices along a bed of fresh evergreen, add amber glass votive holders with tea lights, and finish with a few whole oranges or clove-studded clementines at the ends. The warm amber, orange, and brown tones feel spicy and festive without a single red berry in sight.
Dry the orange slices in a low oven a day ahead, or buy them ready-made from a craft store to save time. The scent grows stronger as the votives warm the spices, so light the candles about thirty minutes before guests arrive. This is also a wonderful centerpiece to make with children, since every ingredient is safe to handle and nothing needs glue.
- Dry orange slices at 200 degrees until crisp, flipping them halfway.
- Bundle cinnamon sticks with twine for a tidy, gift-like look.
- Keep dried citrus away from open flames by using votive holders.
15. Tiered Tray Christmas Centerpiece
A tiered tray packs a whole Christmas scene into one small footprint, which makes it perfect for a round table or a crowded buffet. Start with a two or three-tier tray, then decorate each level with mini ornaments, small pinecones, a short string of fairy lights, and a tiny bottle brush tree. The height draws the eye upward, and every guest gets a good view no matter where they sit.
Keep the tallest items on the bottom tier and the smallest on top so the tray looks balanced rather than top-heavy. A galvanized metal tray suits a farmhouse table, while a white ceramic tray fits a more formal setting. Change the small decorations each year to match your ornament collection, and the tray itself will last for many Christmases.
- Fill gaps with faux snow or small sprigs of greenery for a finished look.
- Use battery fairy lights with a timer so the tray glows hands-free.
- Leave one small empty spot on each tier so the display can breathe.

16. Minimal Scandinavian Branch Centerpiece
For a calm, modern Christmas table, less is truly more. Place a single bare branch in a simple ceramic vase, add two or three white taper candles in plain holders, and lay a natural linen runner underneath. Hang a few tiny white or wooden ornaments from the branch if you like, but leave plenty of empty space. The result is airy and peaceful, and it lets the food and the company take center stage.
Choose a branch with an interesting shape, such as birch or curly willow, and trim it so it rises no more than eighteen inches above the table. A light wood table and white dishes complete the Nordic look, and a few sprigs of fresh greenery at the base keep it from feeling stark. This is the easiest centerpiece in the whole list to build, and it suits small gatherings beautifully.
- Use a heavy vase so a tall branch never tips toward the plates.
- Keep ornaments tiny and few so the branch keeps its clean shape.
- Add one sprig of eucalyptus for a soft touch of green.

17. Plaid and Burlap Farmhouse Centerpiece
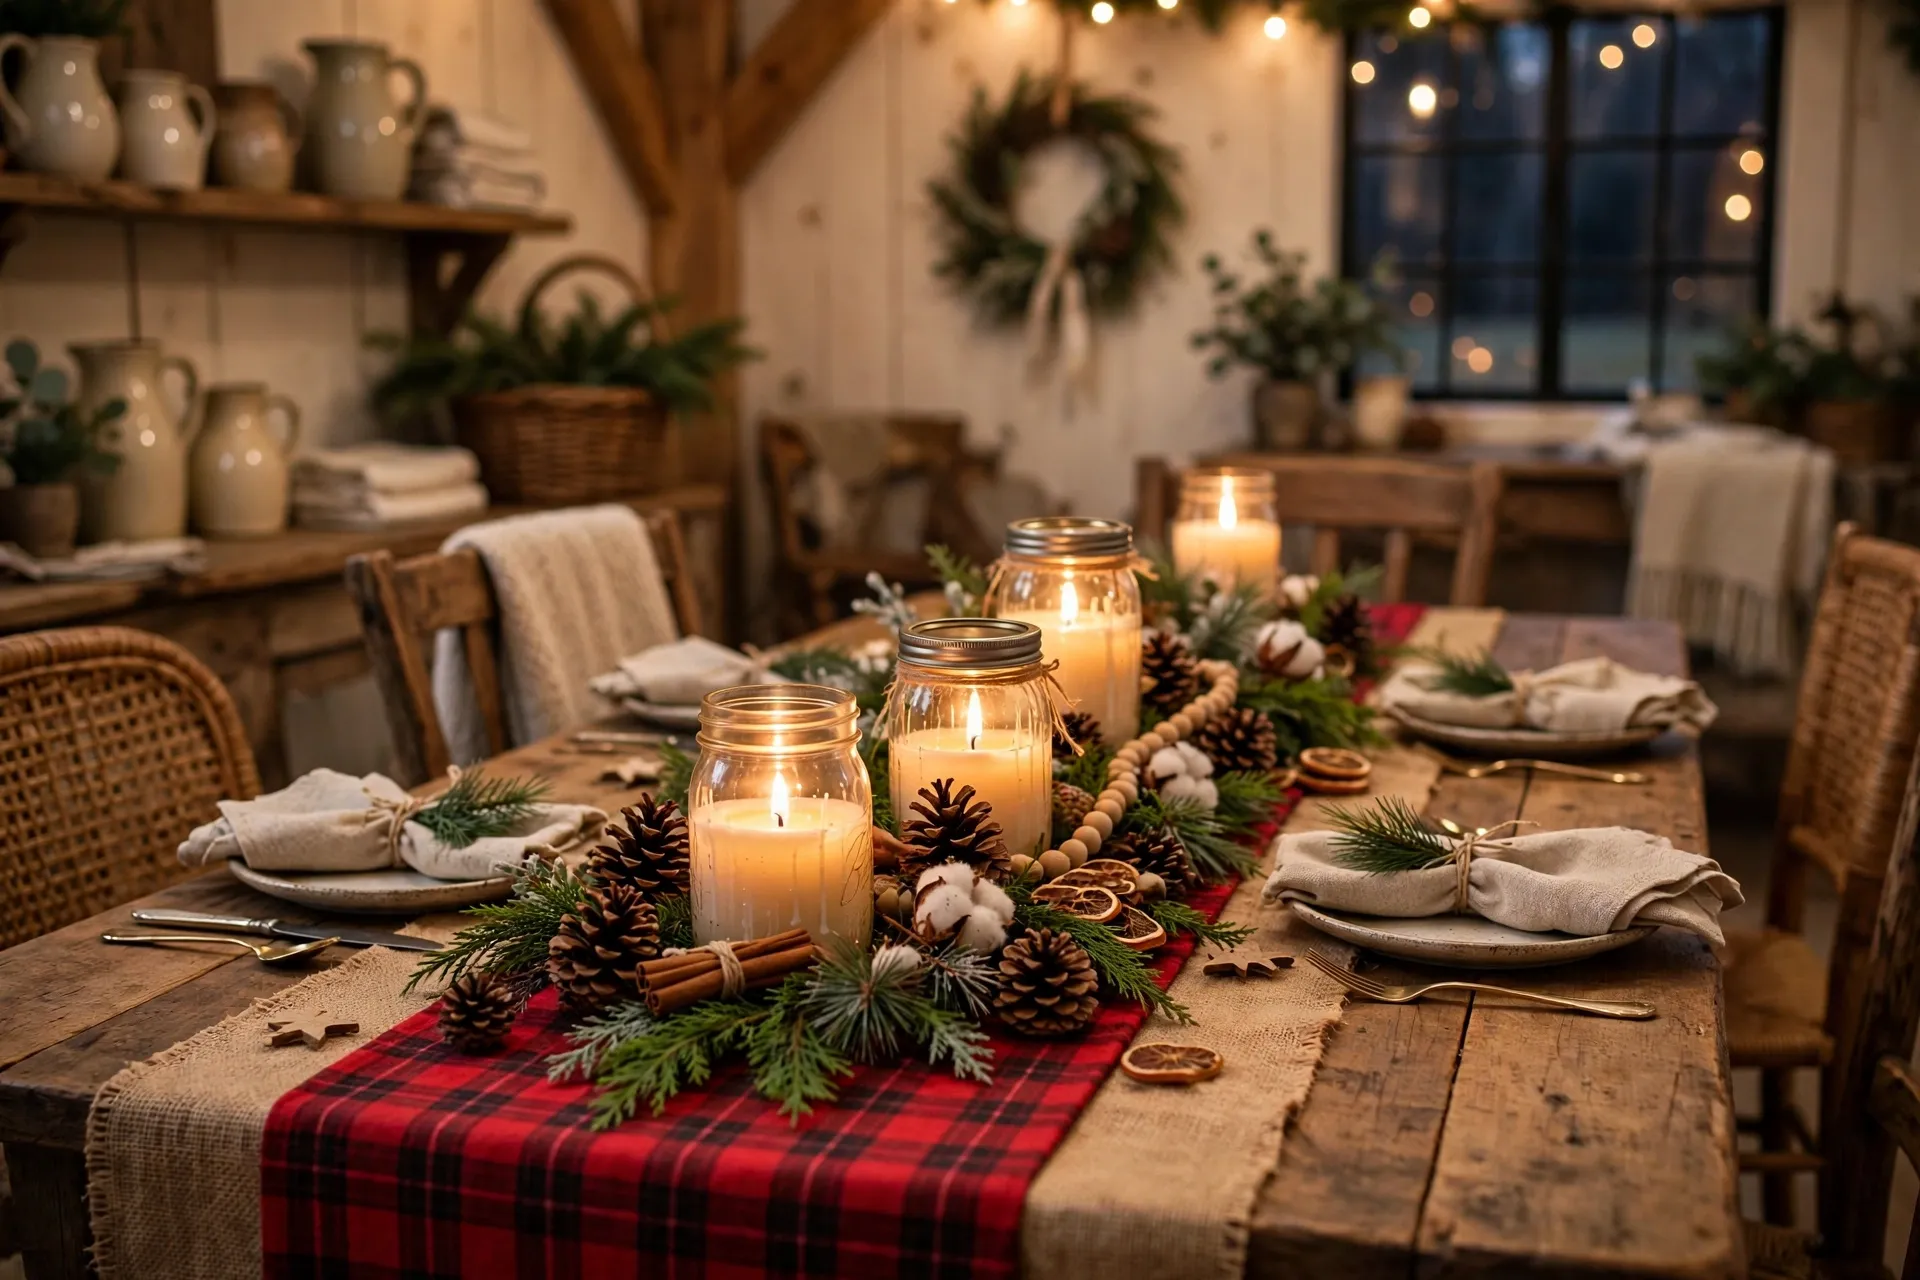
Red plaid and burlap bring instant farmhouse warmth to a Christmas table. Lay a plaid runner down the center, set mason jar candles and pinecones along it, and tuck in sprigs of evergreen and a few red berries. Add a burlap bow or a small wooden sign if you like, but the plaid and the candlelight already do most of the work. It feels like a country Christmas, even in a city apartment.
Mix textures to keep the display interesting: smooth glass jars, rough burlap, soft plaid, and prickly pinecones all play against each other. Use red and black buffalo check for a bold look, or a softer red and cream plaid for something gentler. This style also works well for a Christmas brunch, since the mason jars and plaid feel just as right in daylight.
- Iron the plaid runner first so it lies flat under the jars.
- Use burlap ribbon to tie around jars instead of buying new holders.
- Keep the runner narrow so plates have plenty of room.
18. Ornament-Filled Glass Vase Centerpiece
A tall glass vase filled with ornaments is one of the fastest centerpieces you can make, and it looks like a professional display. Fill the vase with shiny red, gold, and silver ornaments in different sizes, add a few sprigs of evergreen at the base, and set it in the middle of the table. The ornaments catch the light from every angle, and the glass keeps the display feeling open rather than heavy.
Use a vase that is tall enough to rise above the plates but short enough that guests can still see each other, usually twelve to fourteen inches. Fill the bottom with the largest ornaments and layer smaller ones on top so nothing rattles around. If you have extra ornaments from the tree, this is the perfect way to use them, and it ties the table to the tree beautifully.
- Use shatterproof ornaments so a bump never turns into broken glass.
- Mix matte, shiny, and glitter finishes for depth.
- Place a small LED string inside the vase for extra sparkle at night.

19. Advent Candle Christmas Centerpiece Ideas for the Countdown
An Advent wreath centerpiece turns the dinner table into a countdown to Christmas. Arrange an evergreen wreath flat on the table, place four candles in it, three purple and one pink, and decorate the wreath with pinecones, red berries, and a little gold ribbon. Light one candle each Sunday of Advent, so by Christmas dinner all four flames glow together. It is a beautiful tradition that gives the centerpiece meaning beyond decoration.
Use a sturdy wreath base that sits flat, and set each candle in a small metal holder pushed firmly into the greenery so nothing wobbles. Keep a small dish of water nearby when you light the candles, and never leave them burning unattended. If your household does not follow the Advent tradition, four white or red candles in the same wreath still make a lovely centerpiece, and the countdown idea works for any family counting down the days.
- Light the candles in order, one new candle each Sunday of Advent.
- Use dripless candles to keep wax off the evergreen.
- Refresh the wreath with a light mist every few days to slow drying.

Frequently Asked Questions
How long should a Christmas centerpiece be?
A centerpiece should span about two-thirds of the table length. That leaves room for place settings at both ends and keeps the display from crowding the plates. On a round table, keep the centerpiece under eighteen inches wide so every guest has elbow room.
How do I keep a fresh greenery centerpiece looking good?
Mist the branches lightly with water once a day and keep the centerpiece away from heating vents and direct sunlight. Fresh pine, cedar, and eucalyptus usually look good for five to seven days indoors. Build the centerpiece two or three days before the meal for the freshest look.
Are real candles safe in a Christmas centerpiece?
Real candles are safe when you follow a few rules. Keep flames away from dry greenery, never leave burning candles unattended, and place candles in stable holders on a heatproof tray. Flameless LED candles give the same warm glow with no risk, and they are the best choice when children sit at the table.
How far in advance can I make my Christmas centerpiece?
Faux greenery, ornaments, lanterns, and tray displays can be built weeks ahead. Fresh greenery centerpieces last best when made two or three days before the meal. Edible displays such as gingerbread houses should be assembled a day ahead, while floating candle bowls are best built a few hours before guests arrive.
What is the easiest DIY Christmas centerpiece for beginners?
A wooden tray with three pillar candles, pinecones, and evergreen sprigs is the easiest place to start. Everything sits inside the tray, nothing needs glue or wiring, and you can rearrange the pieces until it looks right. The tray also makes it simple to move the whole centerpiece off the table when dinner is served.
Conclusion
A Christmas centerpiece does not need to be expensive or complicated to be beautiful. Whether you choose candlelit evergreen, a bowl of floating cranberries, a gingerbread house, or a single quiet branch, the best centerpiece is the one that fits your table, your style, and your celebration. These 19 DIY Christmas centerpiece ideas give you a starting point for every taste, from rustic farmhouse to gold and white glam.
Pick one idea, gather your supplies this week, and build it before the big day so you can enjoy it instead of rushing. If you are hosting overnight guests too, our Christmas guest bedroom ideas will help the whole house feel as welcoming as the table. Save your favorite centerpiece idea on Pinterest, and have a warm and wonderful Christmas dinner.







2 Comments